
Sending Requests with a PMID/UniqueID
Borrowing requests can be searched and sent through DOCLINE in the ILLiad client.
- From the ILLiad main menu, double-click on Awaiting Request Processing to get the list of transaction requests.
- Open the request you wish to use to create a DOCLINE borrowing request.
- Under the Discovery tab on the Borrowing Request Form, select the PubMed/DOCLINE tab.
- If you don't already have DOCLINE open, click the Open DOCLINE icon on the Discovery Ribbon. ILLiad will connect to DOCLINE after prompting for your user credentials
- A borrowing request can either be filled out manually or by searching and sending criteria from the ILLiad request (usually the PMID) on the Discovery ribbon.
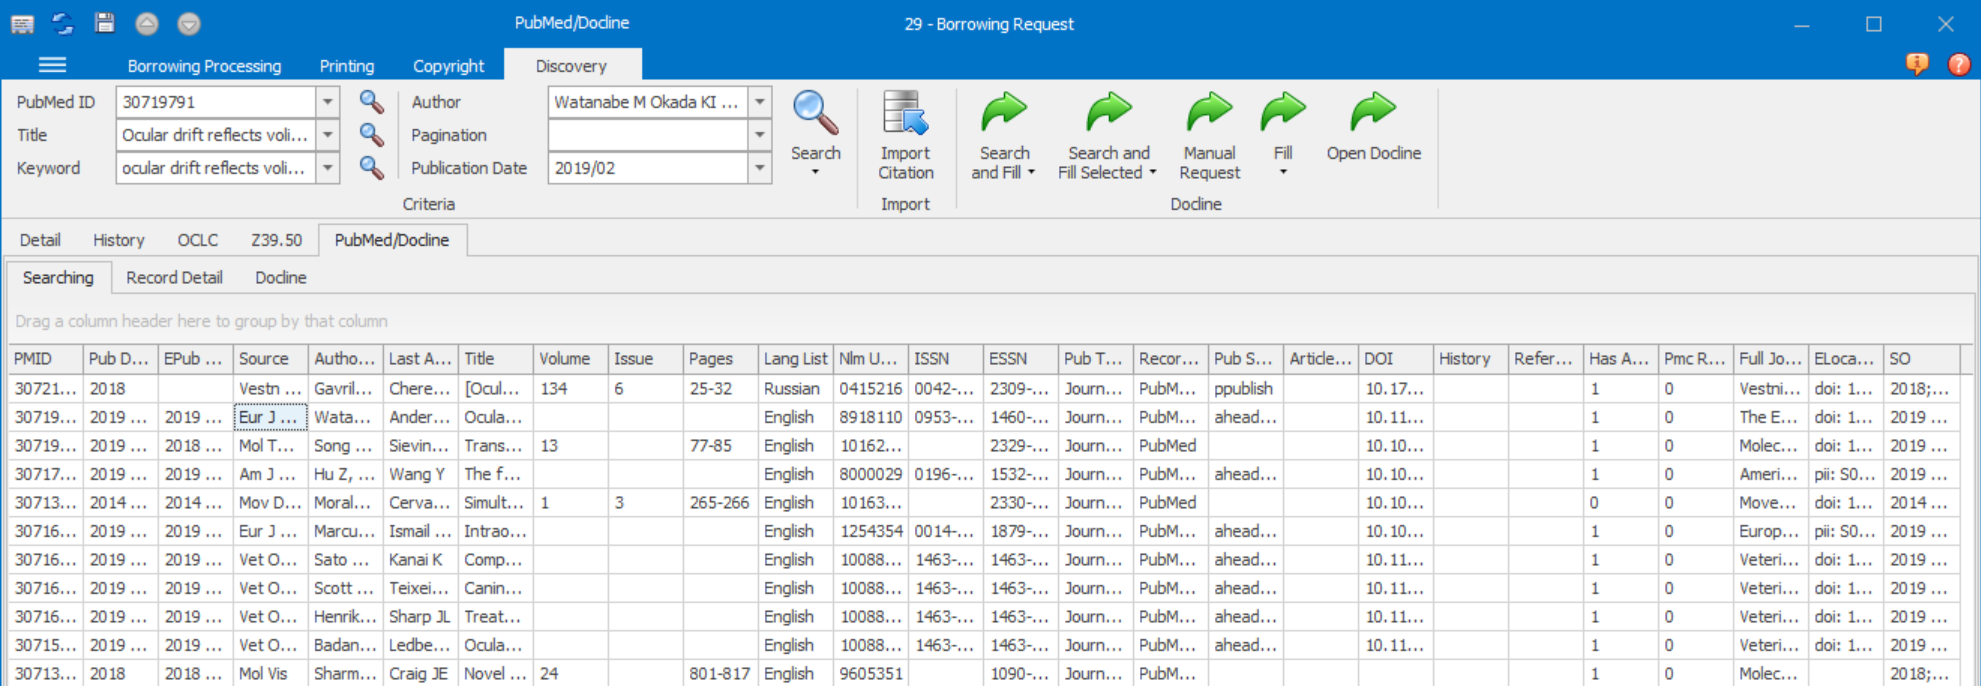
- To search and fill a request, click the bottom half of the Search and Fill icon to bring up a menu of options. Search and Fill will use the PMID ID from the Request.
- Choose one of the following intermediate options:
- Search- DOCLINE will search for the PMID only. If you don't know the PMID unique ID for PubMed, then you will need to search the request first. You will still need to fill out the request and manually click send.
Note: Search doesn't fill out the TN number in the PatronName field. You will manually need to add it or else Odyssey may not be able to match up the request with the returned files.
- Fill and Send- DOCLINE will fill and send the request after searching.
- Search and Send- DOCLINE will search, fill out the form and send the request automatically. This step is for users who do not need to modify the defaults.
DOCLINE will display a warning if the request is for an open-access article or an article that appears to be a duplicate request. When using the Search and Send option, ILLiad will pause on this warning screen to allow you to review this information and modify the request before sending it.
- Search- DOCLINE will search for the PMID only. If you don't know the PMID unique ID for PubMed, then you will need to search the request first. You will still need to fill out the request and manually click send.
- DOCLINE will then navigate to the appropriate screen based upon your previous selection to Search, Fill, Fill and Send, and Search and Send.
- If you selected Search above you will need to verify if the result looks correct, you can then choose to Fill the request form out or Fill and Send at once, by clicking the bottom half of the Search and Fill Selected icon on the Discovery ribbon.
- Choose one of the following intermediate options:
- To search and fill the selected result, click the bottom half of the Search and Fill Selected icon to bring up a menu of options. Search and Fill Selected will choose the highlighted results from searching Pubmed. Note: The Search and Send Selected icon will be greyed out if there are no results from searching PMID.
- Choose one of the following intermediate options:
- Search- DOCLINE will search for the PMID only. If you don't know the PMID unique ID for PubMed, then you will need to search the request first. You will still need to fill out the request and manually click send.
- Search and Fill- DOCLINE will search and fill the request but allow you to edit before sending.
- Search and Send- DOCLINE will search, fill out the form and send the request automatically. This step is for users who do not need to modify the defaults.
DOCLINE will display a warning if the request is for an open-access article or an article that appears to be a duplicate request. When using the Search and Fill or Search and Send options, ILLiad will pause on this warning screen to allow you to review this information and modify the request before filling/sending it.
- Choose one of the following intermediate options:
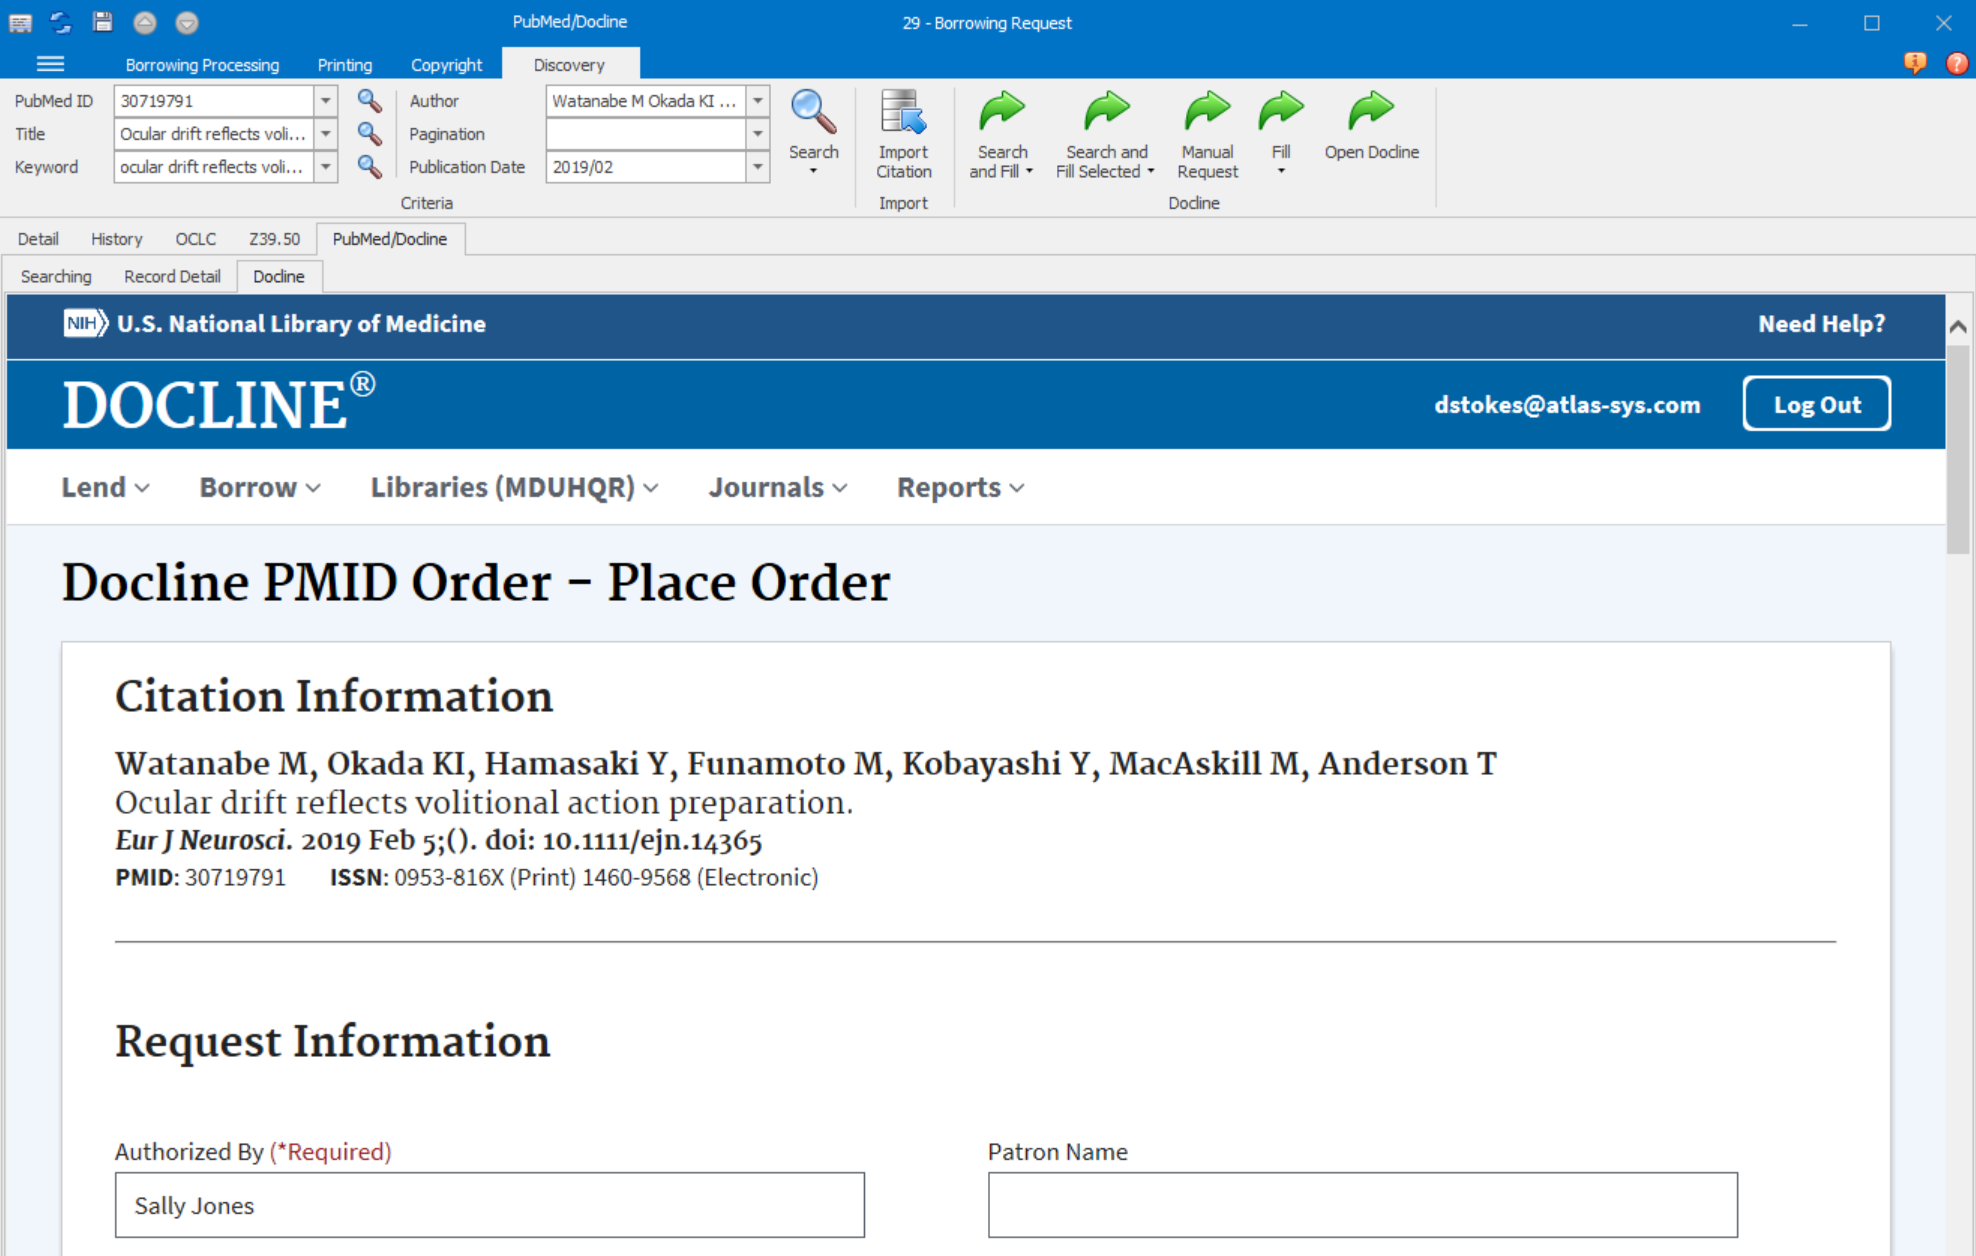
- To manually fill out a request, click the Manual Request icon.
- ILLiad will connect to DOCLINE after prompting for your user credentials.
- Fill out the request form with the appropriate information.
- To fill a request only, click the bottom half of the Fill icon.
- DOCLINE will select the request and fill it out with all the default values from the FieldTranslation.xml file but allow you to browse around and edit before sending.
- DOCLINE will select the request and fill it out with all the default values from the FieldTranslation.xml file but allow you to browse around and edit before sending.
- To search and fill a request, click the bottom half of the Search and Fill icon to bring up a menu of options. Search and Fill will use the PMID ID from the Request.
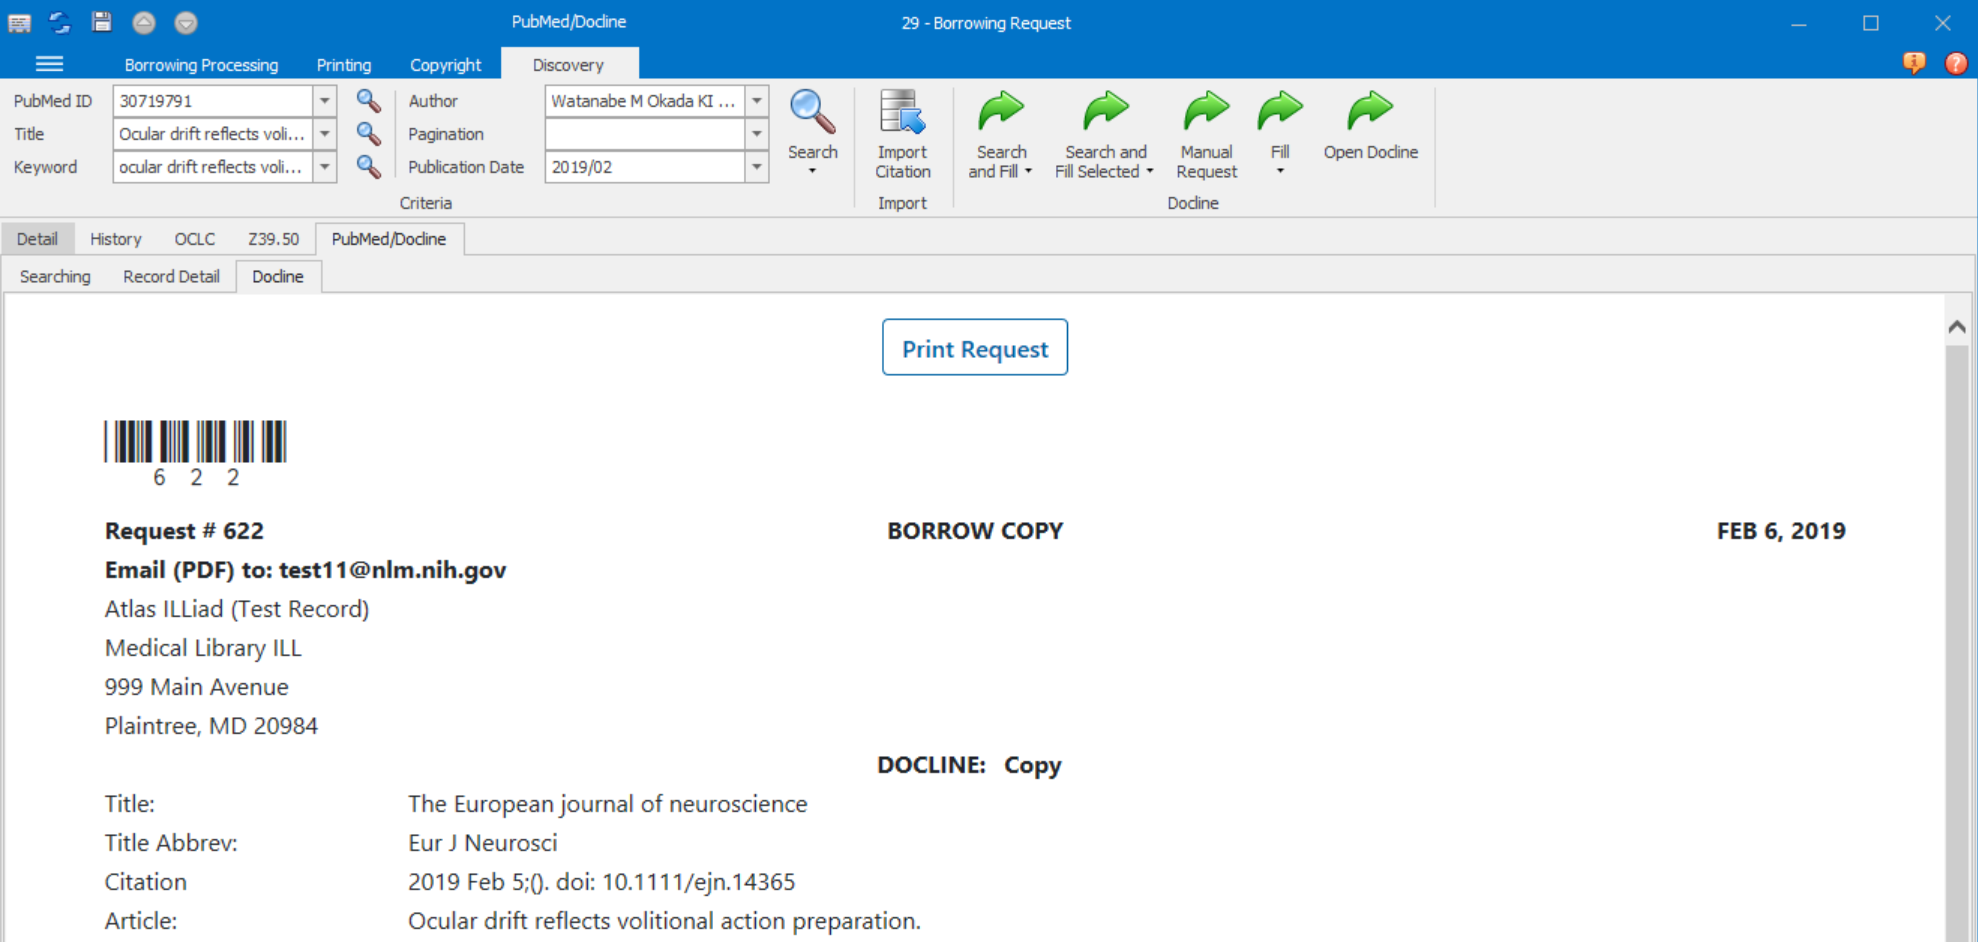
- Once all information has been imported, the request form will switch back to the detail tab. The lender, DOCLINE ILL number, and any imported citation information will be shown as a pending change. If any information is missing, please update the remaining details of the request.
- After the Success status page appears, you will be navigated to the request receipt. No action is required unless you wish to add additional information to the request.
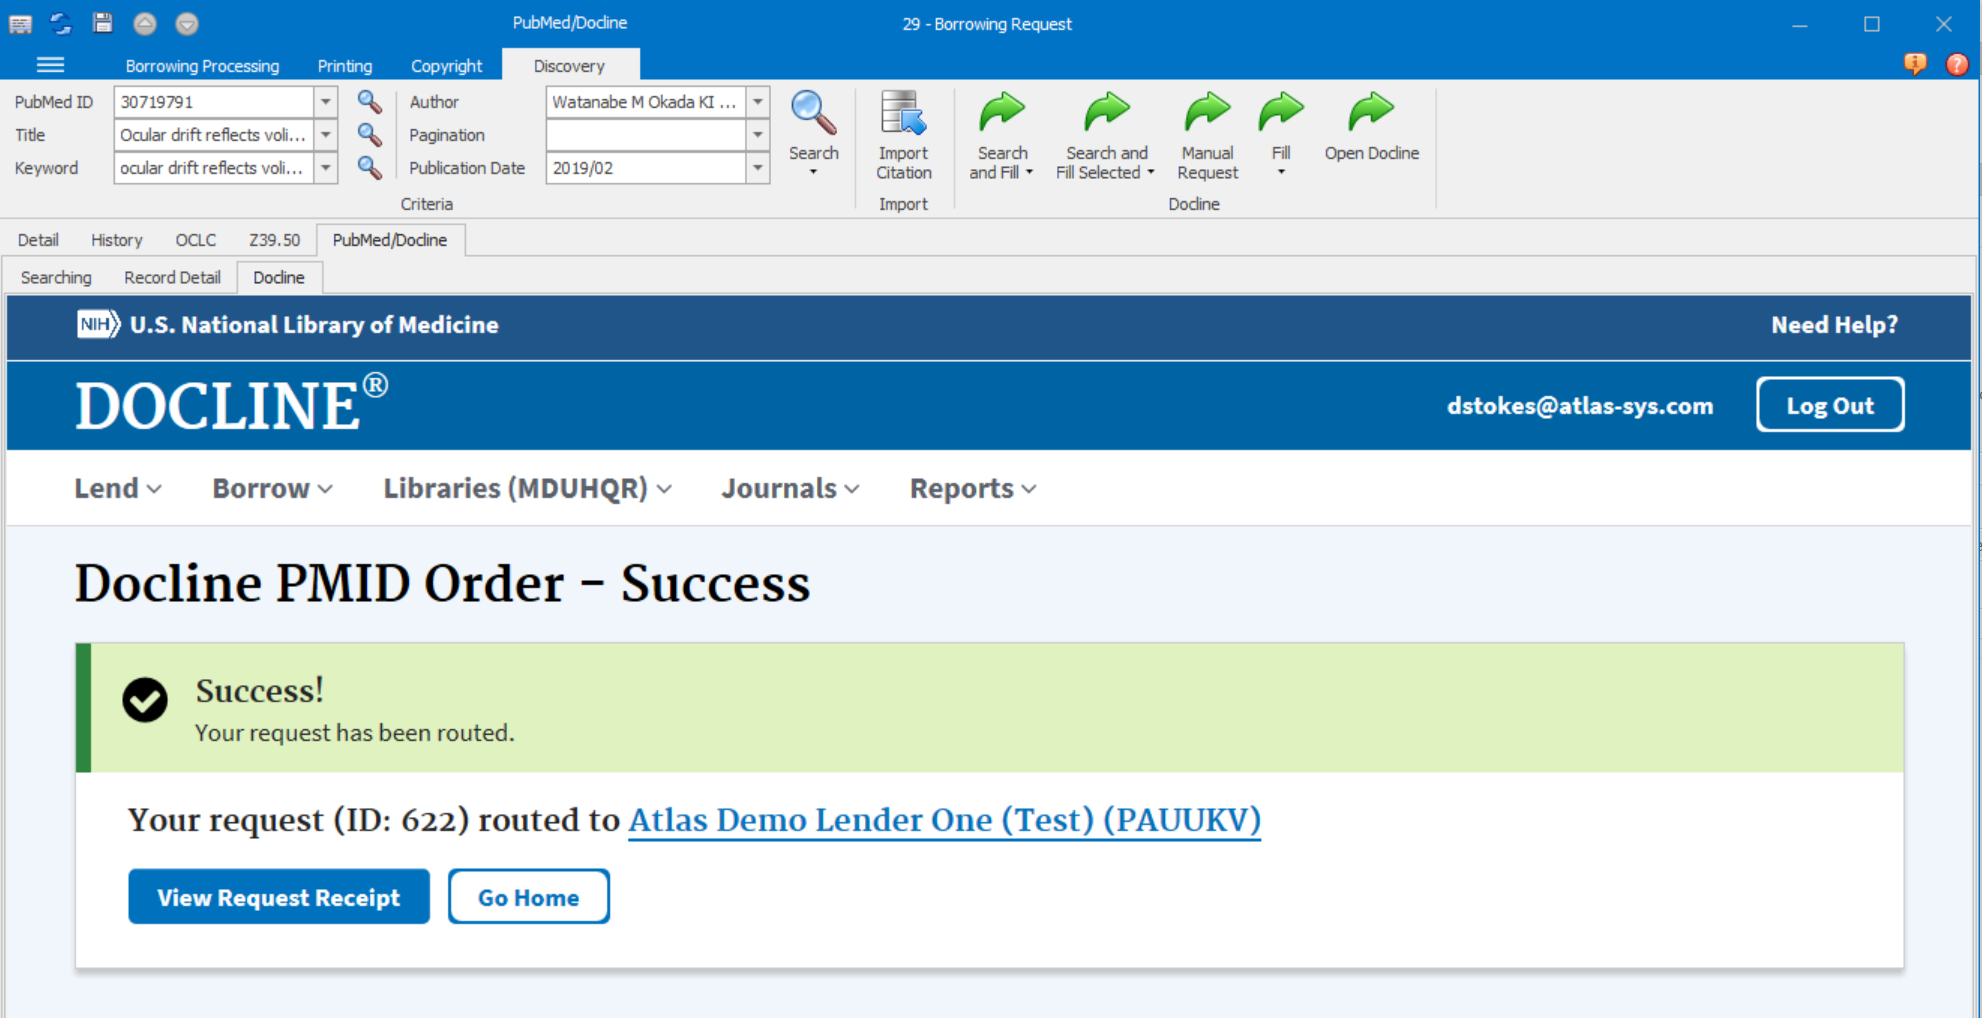
- Click Request Sent on the client ribbon to save and process the request.
Do not close out of the request until the tab has switched to the Success Status Page or to the Request Receipt page.
Transferring Loansome Doc Requests
On July 1, 2019, the National Library of Medicine (NLM) will retire the Loansome Doc system due to declining use; therefore, Loansome Docs will no longer be supported in ILLiad.
For more information to help with this transition, please see NLM’s Loansome Doc Retirement Toolkit at: https://www.nlm.nih.gov/docline/support/LD_toolkit.html