The Course form holds all information pertaining to a particular course such as course details, students and proxies assigned to the course, and the items requested or submitted for the course. Along with editing the specific information, adding users or proxies, or editing items reserved for a course, staff can clone and delete courses and add new items to a course from the Course form. Locate the course using the Search Courses feature. Click on the course in the list of results to open the Course form. You can also access the Course form from within the Instructor's User form and the Item form. The Course form is comprised of the Home ribbon and four tabs: Details, Cross-Listings, Course Items and Course Users. The Course form automatically opens displaying the Home ribbon and the Details tab.
The Ribbon
The Home ribbon of the Course form is comprised of an Options group containing commands to use for cloning and deleting courses as well as adding reserve items.
|
Delete Course |
Opens a Delete Confirmation form asking if you want to remove the |
|---|---|
|
Clone Course |
Opens the Clone Course form allowing you to close the course to |
|
Add Item |
Opens a new Item form for you to add a new item to the course. |
The Details Tab
All course information added when the course was created is displayed on the Details tab. View, add and edit basic course information, such as the course name, start and stop dates, default pickup location or other information that may be incorrect or have changed. You can also assign a course password here. Fields that you edit are highlighted until the changes have been saved using the Save icon. If you attempt to close the Course form before saving your changes a popup box prompts you to save your changes.
Course Details Group
|
Field Name |
Database Fieldname |
Field Entries |
Field Specifications |
|---|---|---|---|
|
Course Name |
CourseName |
|
|
|
Course ID |
CourseID |
|
Read-only field |
|
Description |
Description |
|
|
|
Course Code |
CourseCode |
|
|
|
URL |
URL |
|
|
|
Course Number |
CourseNumber |
|
|
|
Department |
Department |
Populated from CustomDropDown table. |
Value must match an entry in the list. |
|
Default Pickup Site |
DefaultPickupSite |
Populated from DefaultPickupSite key. |
Value must match an entry in the list. Value is required. |
|
Course Password |
CoursePassword |
|
|
|
Max Copyright Cost |
MaxCopyright |
|
|
|
External Course ID |
ExternalCourseID |
|
|
|
Registrar Course ID |
RegistrarCourseID |
|
|
Semester Details Group
|
Field Name |
Database Fieldname |
Field Entries |
Field Specifications |
|---|---|---|---|
|
Semester |
Semester |
Initial value is current semester |
List of semesters, descending order by start date. |
|
Override Semester Start/Stop Dates? |
|
|
Checkbox |
|
Start Date |
StartDate |
Initial value is start date of the chosen semester. |
Disabled unless option to override is checked. |
|
Stop Date |
StopDate |
Initial value is stop date of the chosen semester. |
Disabled unless option to override is checked. |
User Information Group
|
Field Name |
Database Fieldname |
Field Entries |
Field Specifications |
|---|---|---|---|
|
Instructor Name Override |
|
|
If populated, the contents of this field will override the automatically-generated contents of the Displayed Instructor(s) field. |
|
Displayed Instructor(s) |
|
Automatically generated by concatenating all course users designated as "Instructor" in the Course Users table. |
|
|
Estimated Enrollment |
CourseEnrollment |
|
|
|
Registered Users |
|
Display count of Users |
UserType = 'User'. The registered user count includes only course users of type 'User'. Instructors and proxies are no longer included. |
If Instructor Name Override is missing from your course form, you may have to manually add this field using the Customize Layout option. See Adding and Removing Fields on Forms for more information on this process.
The Cross-Listings Tab
The Cross-Listings tab on the Course form allows staff to add and delete cross-listings for a course. Cross listings are added to the grid located on the tab. Visible on the form are any cross-listings that may have been added by staff or by an Instructor or proxy using their web account. Cross-listing information from the web is loaded to the form when the staff user accesses the Cross Listings tab for the first time. Clicking the Refresh button in the Quick Access Toolbar refreshes the list when you are on the Cross Listings tab and also updates the data, once it has been accessed, when you are on the Course form. Cross listings added to the tab must be saved using the Save icon before changes take effect. Unsaved listings prompt a confirmation message when you attempt to leave the form. The cross-listings grid displays all fields from the CrossListCourse table.
The fields visible on the form, and their database field name along with field specifications are shown below:
|
Field Name |
Database Field Name |
Field Specifications |
|---|---|---|
|
Department |
Department |
Based on values in CustomDropDown table |
|
Course Number |
CourseNumber |
|
|
Course Name |
Name |
|
|
Course Code |
CourseCode |
|
The Course Items Tab
The Course Items tab on the Course form contains a list of all reserve items requested for a course. Double-clicking on a reserve item in the Course Items list opens the Item form to view or edit the item. Item information is loaded to the list when the staff user accesses the Course Items tab for the first time. Clicking the Refresh button in the Quick Access Toolbar refreshes the list when you are on the Course Items tab and also updates the data, once it has been accessed, when you are on the Course form. The Course Items grid displays all fields from the Items table.
The Course Items ribbon houses a Clone and Add Item button.
Course Items Count
The Course Items tab displays the number of items available and the total number of items in the course. Updated counts are loaded to the tab when the Course form is opened.
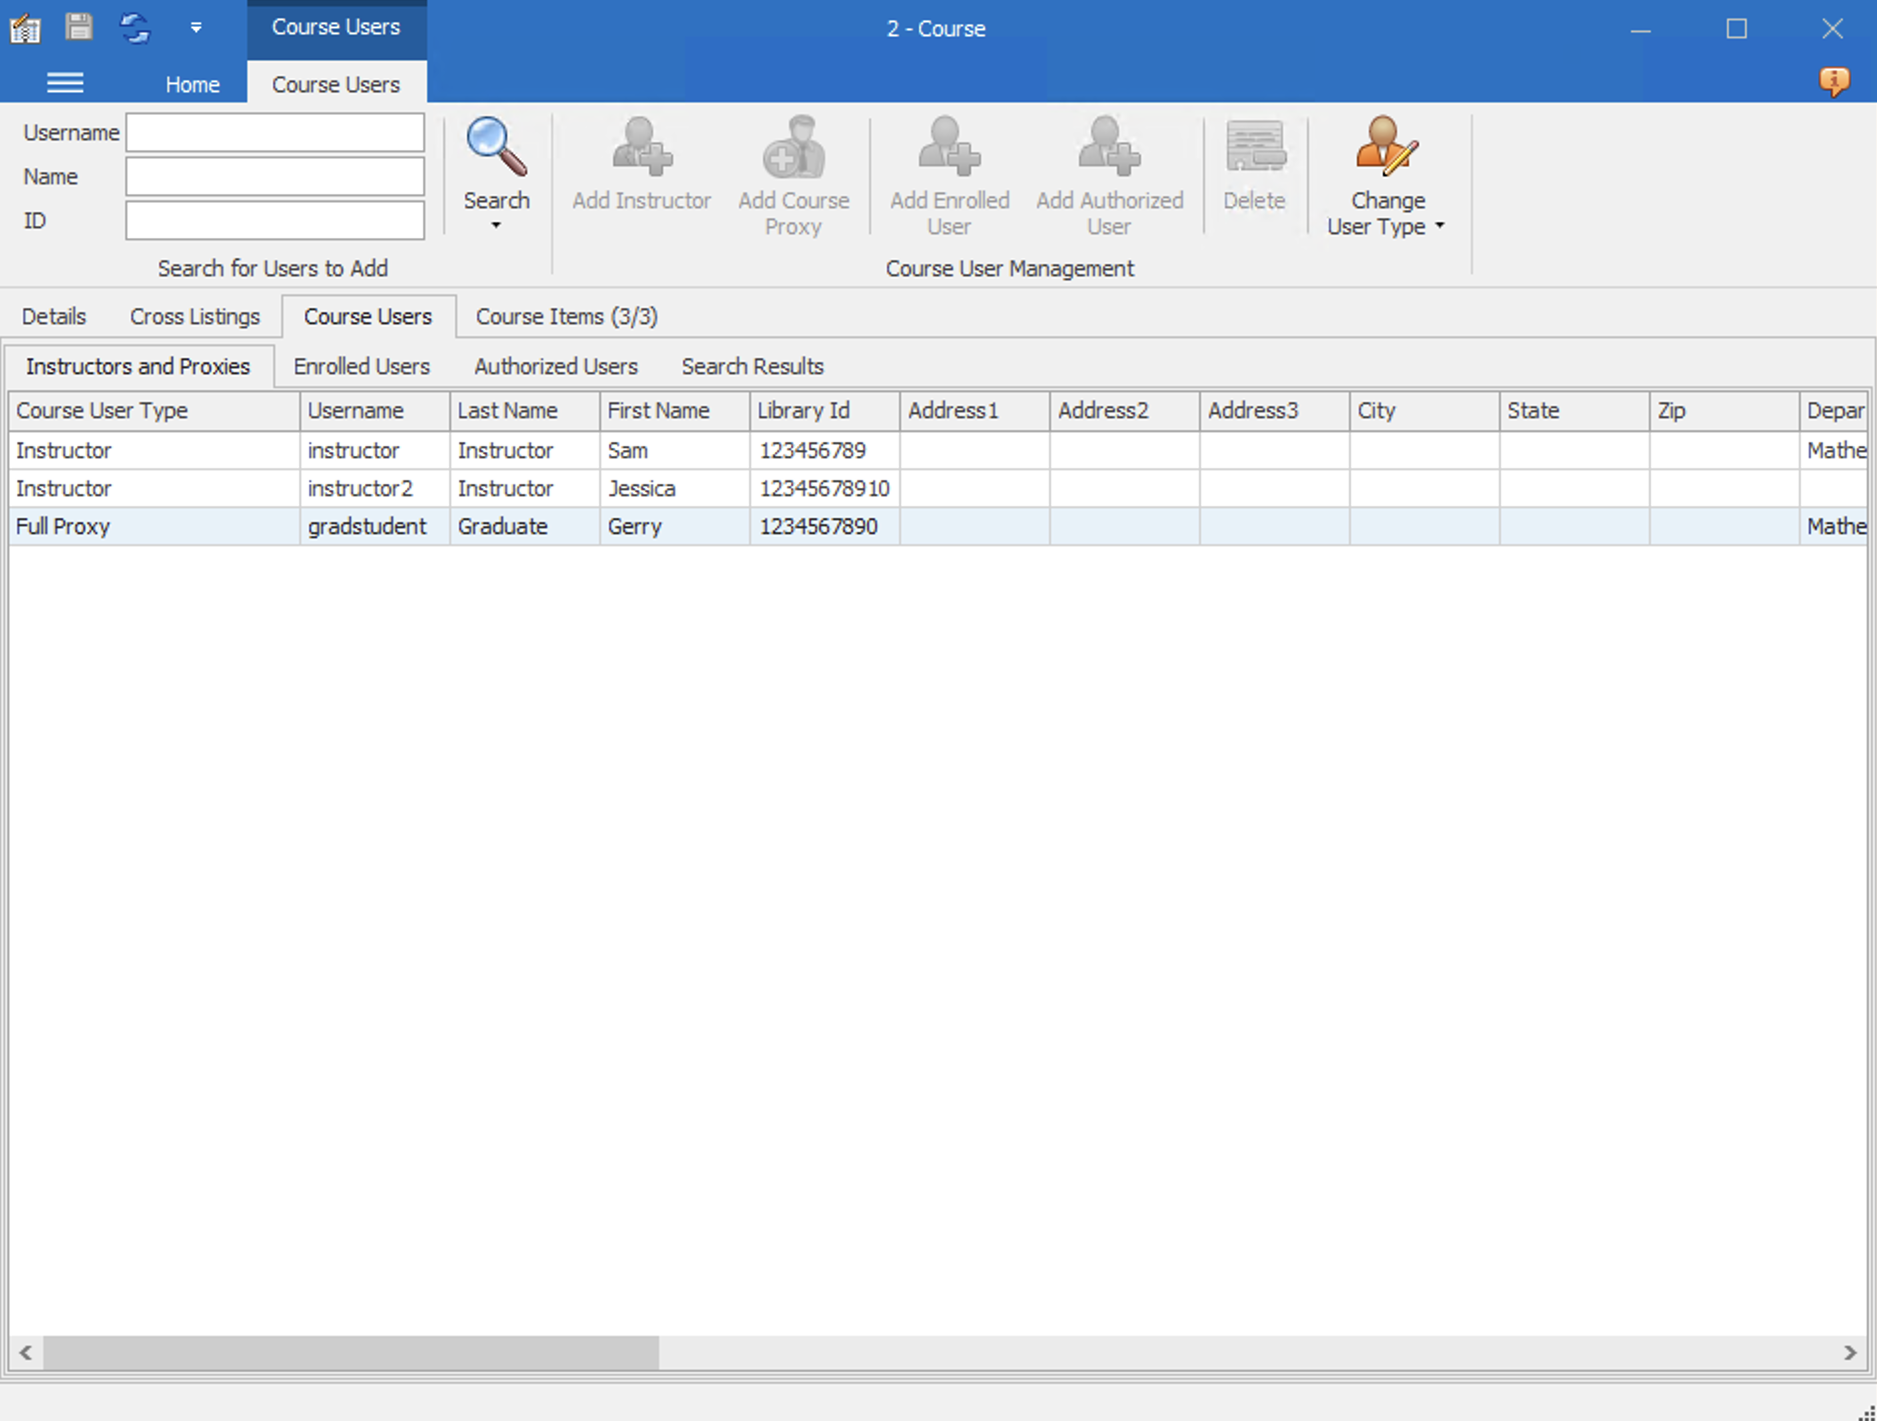
The Course Users Tab
Add, delete and view enrolled students, authorized users, instructors, and course proxies for a course from the Course Users tab. Course User information from the client or web is loaded to the form when the staff user accesses a specific Course Users tab for the first time. As of Ares 5.0, the Course User's tab has the following sub-tabs:
- Instructors and Proxies - this displays Instructors and their Proxies together in a master-detail view.
- Enrolled Users
- Authorized Users
A user can be added to the Instructors and Proxies, Enrolled Users, or Authorized Users tab by using the Username, Name, or ID search controls on the Course Users tab to search for a user record, selecting the user record in the Search Results grid, and clicking the Add Instructor, Add Course Proxy, Add Enrolled User, or Add Authorized User button in the Course Users Ribbon. The User Type for a user can be changed using the Change User Type button, or the user can be deleted from the course using the Delete button.
Additions and deletions must be saved using the Save icon before changes take effect. Unsaved changes prompt a confirmation message when you attempt to leave the Course Users form. Clicking the Refresh button in the Quick Access Toolbar refreshes the list when you are on the Course Users tab and also updates the data, once it has been accessed when you are on the Course form.