The integration of ILLiad and Aeon via two new web services makes it possible for ILLiad staff to place Aeon requests directly from the ILLiad client and for Aeon staff to respond to the requests directly from the Aeon client.
All of the following steps must be completed in order for this integration to work.
For instructions on how to use these integration features in the ILLiad and Aeon clients, please see Using Web Platform Integration with ILLiad and Aeon for ILLiad instructions.
WebPlatformConfig Table
ILLiad WebPlatformConfig Table
First, we will make entries in the WebPlatformConfig table. This table provides ID information that allows ILLiad and Aeon to talk to each other.
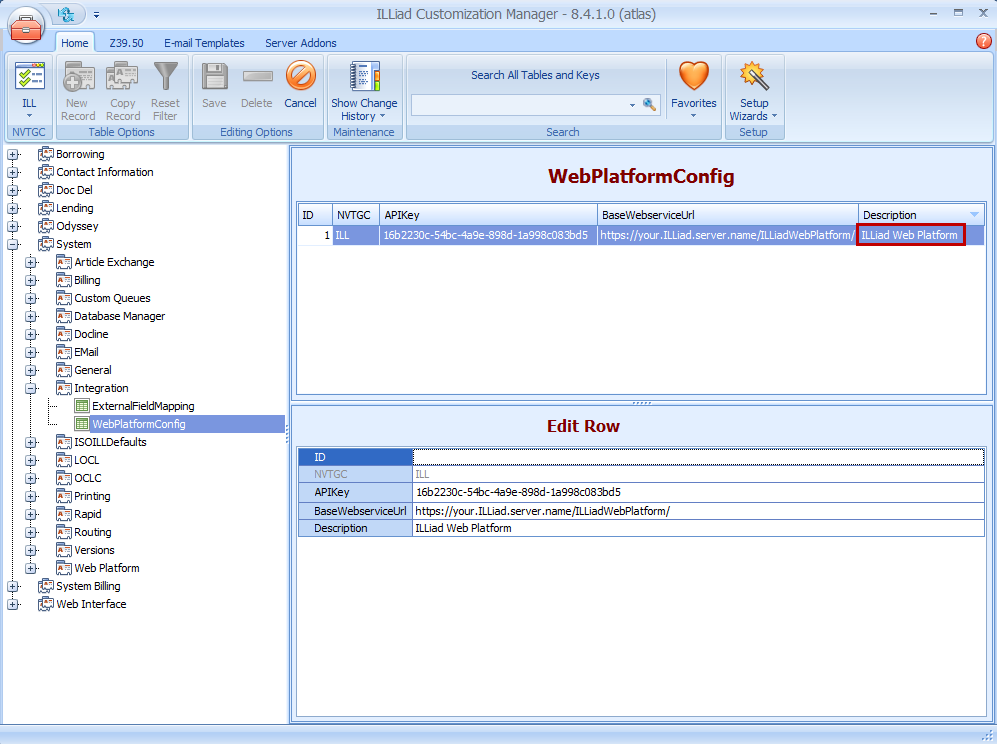
These entries will be made in the ILLiad Customization Manager under System | Integration | WebPlatformConfig.
This entry must be made in the ILL NVTGC in the ILLiad Customization Manager.
- Click New Record.
-
Create an entry for the ILLiad Web Platform by filling in the following values:
ID This field is auto-generated. NVTGC This field is auto-generated (ILL). API Key Click on the API Key field, then click the ellipses to generate this. Base Webservice URL This URL should point to your ILLiad Web Platform. This will look like https://your.ILLiad.server.name/ILLiadWebPlatform/. The URL must contain https and you must have an SSL certificate installed. Description Fill in a description that helps you identify that this entry points to the ILLiad Web Platform. - Click Save.
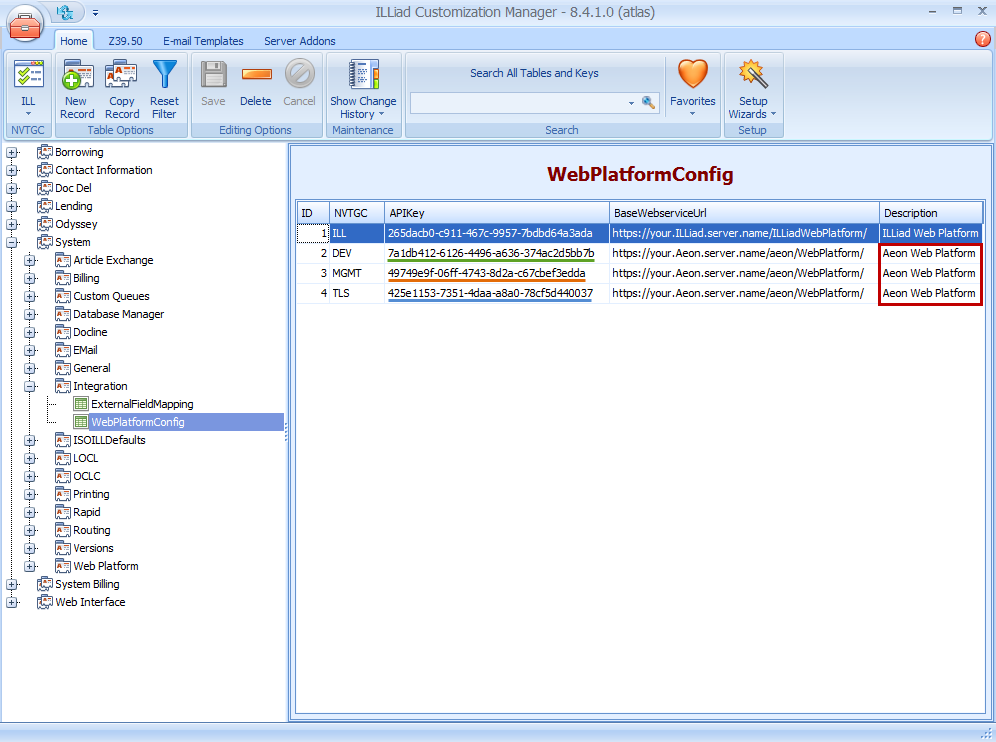
You will now need to add an entry for each shared server site in the specific site code's NVTGC in the ILLiad Customization Manager. In our example, we have separate entries under the DEV, MGMT, and TLS shared server site codes.
- Click New Record.
-
Create an entry for the Aeon Web Platform by filling in the following values:
ID This field is auto-generated. NVTGC This field is auto-generated (ILL). API Key Click on the API Key field, then click the ellipses to generate this. This API Key will be used again in the Aeon Customization Manager. Base Webservice URL This URL should point to your Aeon Web Platform. This will look like https://your.Aeon.server.name/aeon/WebPlatform/. The URL must contain https and you must have an SSL certificate installed. Description Fill in a description that helps you identify that this entry points to the Aeon Web Platform. - Click Save.
Aeon WebPlatformConfig Table
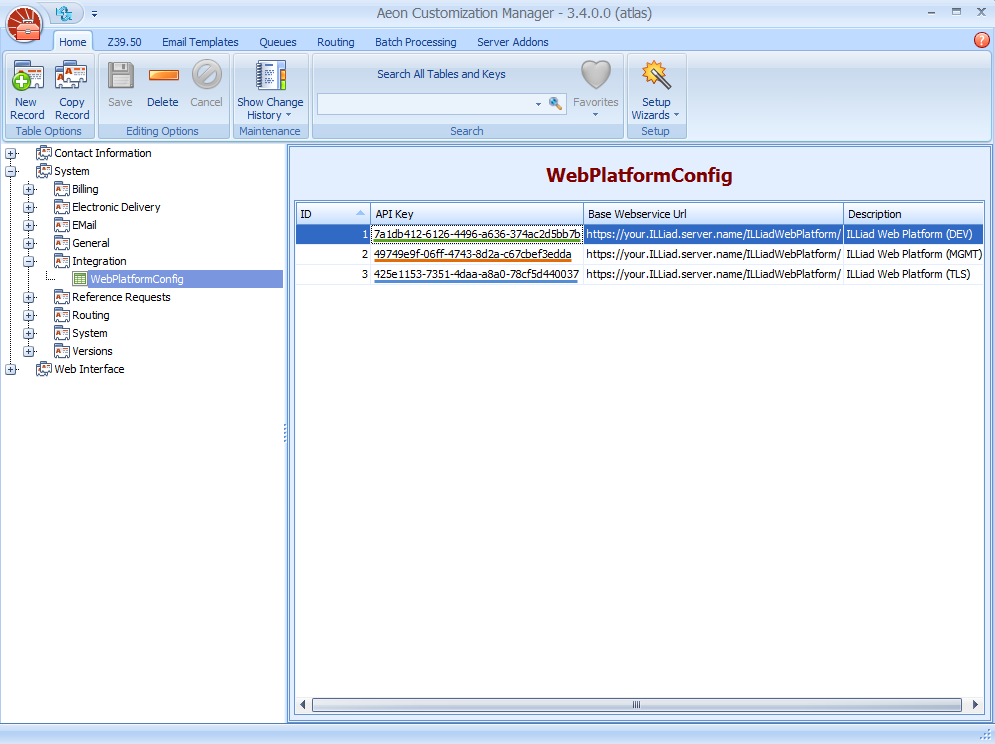
Next, we will do the same in the WebPlatformConfig table in the Aeon Customization Manager.
Again, the table is under System | Integration | WebPlatformConfig.
You will need to make one entry for each shared server site. The API Key field in each entry MUST match the API Key field in the corresponding entry in the ILLiad Customization Manager.
- Click New Record.
-
Create an entry for the ILLiad Web Platform by filling in the following values:
ID This field is auto-generated. API Key This value MUST match the Aeon Web Platform entry in the ILLiad WebPlatformConfig table. The easiest way to make sure these values match is to copy from the ILLiad Customization Manager and paste into the Aeon Customization Manager. Base Webservice URL This URL should point to your ILLiad Web Platform. This will look like https://your.ILLiad.server.name/ILLiadWebPlatform/. The URL must contain https and you must have an SSL certificate installed. Description Fill in a description that helps you identify that this entry points to the ILLiad Web Platform. - Click Save.
WebPlatformConfig Key
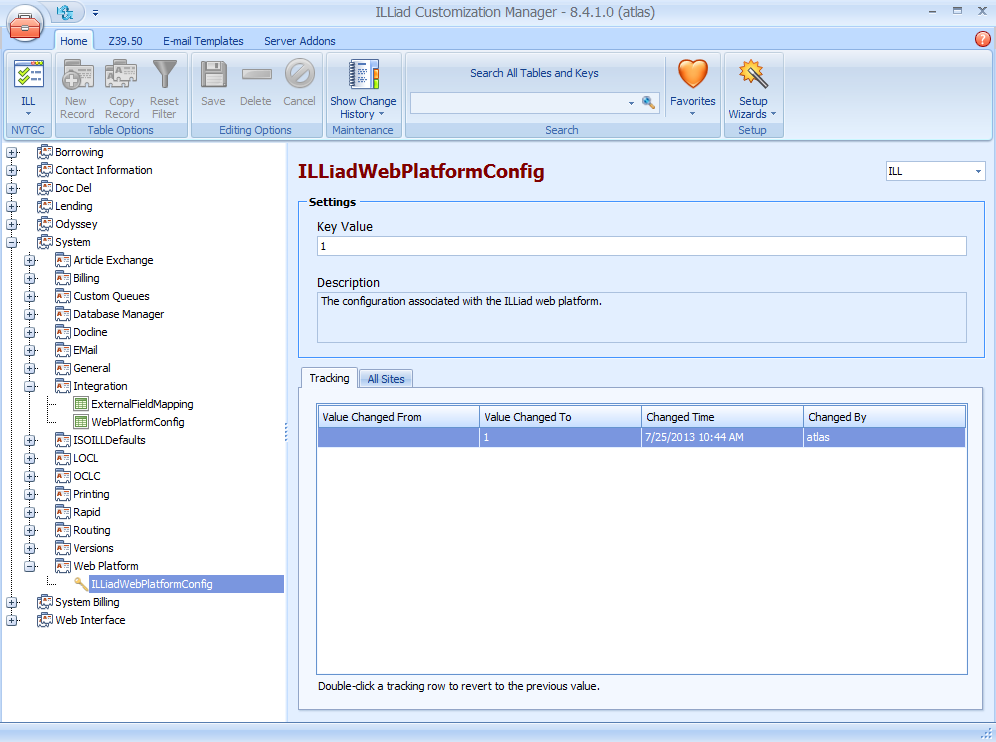
Now that we have made the needed entries in the WebPlatformConfig tables, we need to enter a WebPlatformConfig Key value. This key tells ILLiad which platform configuration entry to use when trying to talk to its own web platform.
This entry will be made in the ILLiad Customization Manager under System | Web Platform | ILLiadWebPlatformConfig.
- Click New Record.
- Enter the Key Value. This value will be the ID number for the WebPlatformConfig table entry (made in the ILLiad Customization Manager) that identifies the ILLiad Web Platform.
In the example we have been using, the value will be set to 1. - Click Save.
External Field Mapping
The last step in integrating ILLiad and Aeon is filling out the ExternalMapping table in the ILLiad Customization Manager. This table identifies how fields will be mapped from ILLiad to Aeon.
This would be best to discuss between the Special Collections and Interlibrary Loan departments to make sure relevant data gets to the best fields in Aeon.
This entry will be made in the ILLiad Customization Manager under System | Integration | ExternalFieldMapping.
In the External Field Mapping table, you will need to make unique entries for each shared server site. In our example, If we would like a mapping entry to apply to all three shared server sites, we would need to make three separate entries in the table, each with a unique SystemID (2, 3, or 4).
- Click New Record.
-
Create an External Field Mapping entry by filling in the following values:
Name The name of the mapping entry, either Loan or Photoduplication. Value This identifies which ILLiad field value is sent to Aeon. It can also contain more than one ILLiad field value separated by text or spaces to be combined into one field in Aeon. See examples below for more details. SystemID This number MUST correspond with the WebPlatformConfig table entry (in the ILLiad Customization Manager) that identifies the Aeon Web Platform for that specific shared server site code. In the example we have been using, there are three options: 2, 3, and 4. If you want an external field mapping entry to work for all shared server sites, you will need to make duplicate entries in the table, each with a different SystemID (2, 3, or 4) identifying each shared server site. ExternalType Identifies the type of field to which you are mapping. At this time there are only two valid values:
Transaction maps directly to an Aeon Transaction field.
Parameter includes the value as a GET parameter when sending the request to the Aeon web platform. Currently the only valid parameter entry is IsPhotoduplicationRequest and that entry is required in the ExternalField entry if Parameter is chosen.ExternalField This identifies the actual field name in Aeon to which the value will be mapped from ILLiad. - Click Save.
External Field Mapping Guidelines
External Field Mapping entries will be different from institution to institution depending on specific needs and policies. These entries will map the fields from an ILLiad request to the ones in Aeon and vice versa.
- You will need to create a generic ILL user account in your Aeon database. All requests from ILLiad will be mapped to this username in Aeon.
- You will need the following entries in your ExternalFieldMapping table for the ILLiad/Aeon integration to work properly:
You will need to make these entries for each shared server site. In our example, we would have these four entries with SystemID 2, four entries with SystemID 3, and four entries with SystemID
| Name | Value | SystemID | ExternalType | ExternalField |
|---|---|---|---|---|
| Loan | False | 2/3/4 | Parameter | IsPhotoduplicationRequest |
| Photoduplication | True | 2/3/4 | Parameter | IsPhotoduplicationRequest |
| Loan | ill_user (or the username you have created in Aeon to accept ILLiad requests) | 2/3/4 | Transaction | Username |
| Photoduplication | ill_user (or the username you have created in Aeon to accept ILLiad requests) | 2/3/4 | Transaction | Username |
The following are some example transaction entries that you can use as a template for more entries:
As with the required entries, if you want the same mapping in all of your shared server sites, you will need to make duplicate entries with unique SystemIDs in each entry. If you want a mapping entry to apply to only one of the shared server site, only one entry with that site's SystemID is required.
| Name | Value | SystemID | ExternalType | ExternalField |
|---|---|---|---|---|
| Loan | <#Transaction Field="LoanTitle"> |
2 |
Transaction | ItemTitle |
| Photoduplication | <#Transaction Field="PhotoJournalTitle"> |
3 |
Transaction | ItemTitle |
| Loan | <#Transaction Field="PublicationPlace"> - <#Transaction Field="PublicationDate">
|
4 |
Transaction | ItemPublisher |
| Photoduplication | <#Transaction Field="PhotoJournalVolume"> : <#Transaction Field="PhotoJournalIssue"> |
2 |
Transaction | ItemVolume |
Restart Services
The final step is to restart the IIS and Odyssey Manager services on the ILLiad server. Atlas-hosted sites will need to contact Atlas support for this restart. Locally hosted sites will need to ask their local server administrator to do this.


