
The Decision Support Pipeline (DSP) will enable you to combine the power of Routing Rules and Server Addons to automate request processing based on target information (e.g., costs, local holdings, etc.) and the business rules set in the Customization Manager. Listed below are the step-by-step instructions for configuring the DSP. For a more in-depth explanation of the DSP feature and how everything works together, see Decision Support Pipeline Overview.
1. Create DSP Queues in the Customization Manager
The following queues will need to be manually added to the CustomQueues table in the ILLiad Customization Manager located under System | CustonQueues before the Decision Support Pipeline can be used (these queues should have a ProcessType of Borrowing):
- Awaiting Request Pipeline: This queue is used for loans as well as articles that have passed the copyright step.
- Awaiting Pre-Copyright Pipeline: This queue is used for articles that require a copyright clearance step.
- Awaiting Copyright Clearance - Pipeline: This queue is used for articles that have passed through the Pre-copyright pipeline and still require copyright review. This queue opens automatically on the Copyright Clearance Form.
- Awaiting Pipeline Request Review: This queue is where requests go when they are not automatically sent by the Automation Decision stage of the Decision Support Pipeline. This can either be because none of the business rules matched or because the business rule it matched was set to have a Recommend action.
2. Upload DSP Addons to the Customization Manager
- Download the DSP addon(s) from the ILLiad Addon Directory.
- For more information on Installing addons, see Installing and Configuring Server Addons.
- Log into the Customization Manager and navigate to Addons | Server Addons.
- Select the Server Addons tab.
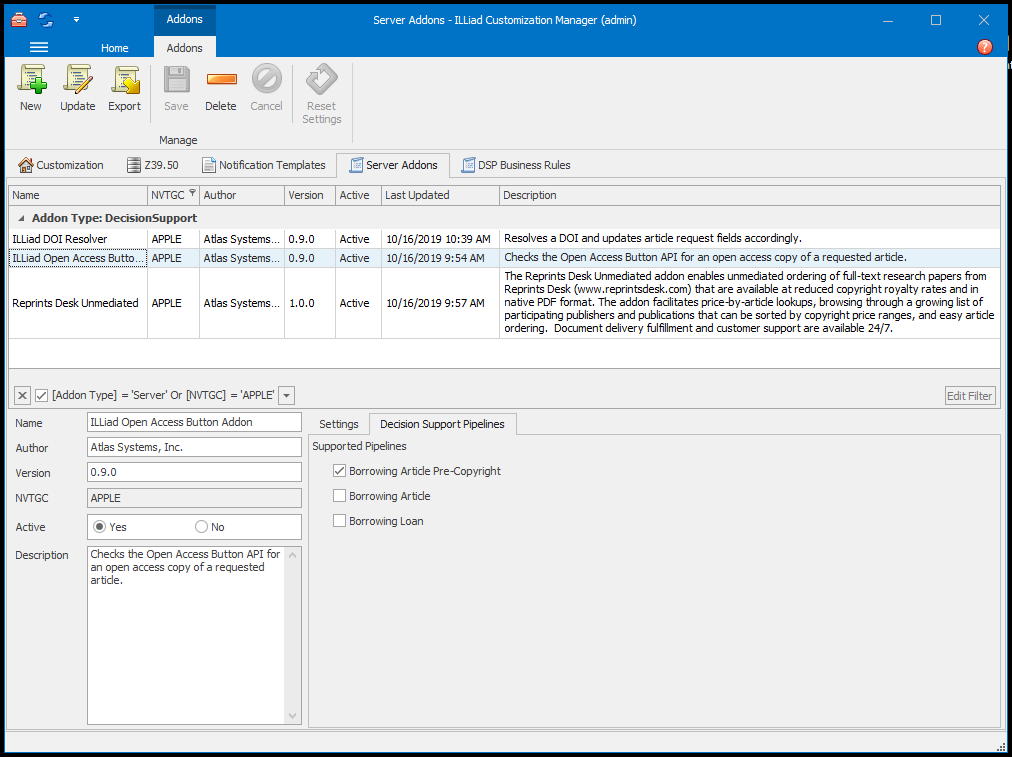
- Click the New button in the Server Addons Ribbon to upload the DSP addon.
- In the bottom pane, select the NVTGC.
- Select one or more of the Supported Pipelines to subscribe to the addon to that Pipeline.
- On the Server Addon Ribbon, click Save.
- Repeat steps to upload an addon for each NVTGC.
3. Set Business Rules
- In the Customization Manager under Addons | DSP Business Rules, select the DSP Business Rules tab.
- Click the New button to add a rule.
- In the bottom pane, fill out the following information:
- Rule Number
- Pipeline
- Rule Type
- Target Type
- Target
- Description
- *Optional- Match String
- Click Save.
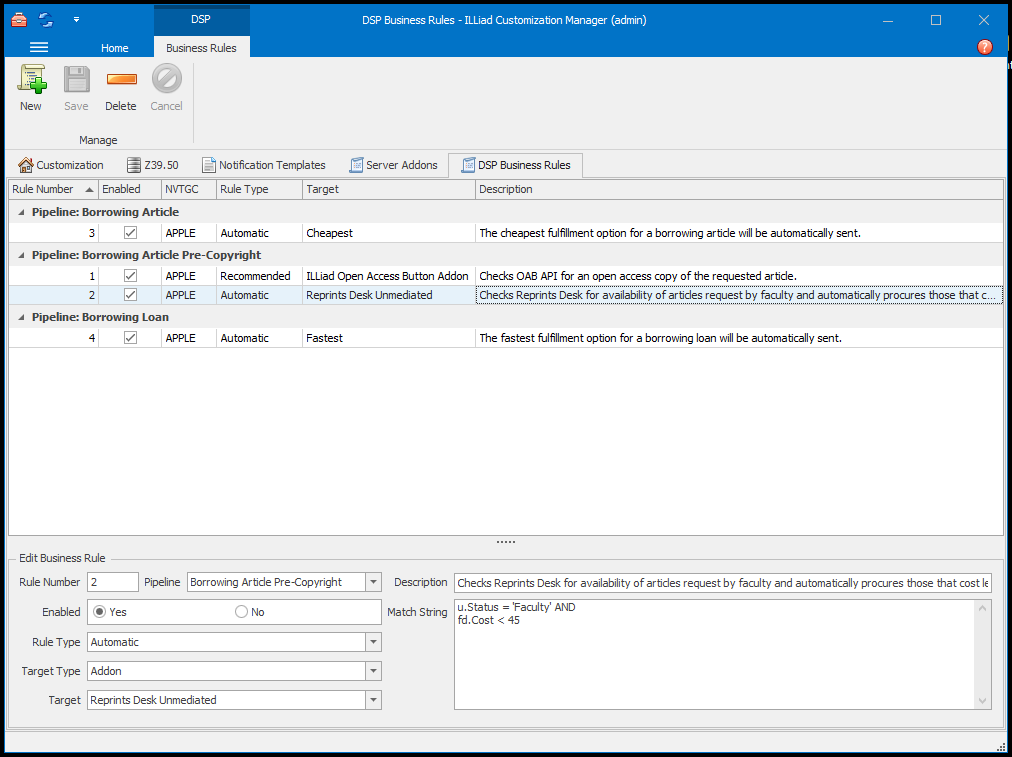
For example business rules, see Business Rules Workflow and Examples.
4. Creating Routing Rules
The DSP feature will not work until you have created routing rules in the Customization Manager under System | Routing. The rules should be configured to pick up the request and move it into the input queue of the DSP pipeline based on the RequestType.
Manually routing requests to the Awaiting Pre-Copyright Pipeline queue for Articles or the Awaiting Request Pipeline queue for Loans will also jump-start the DSP feature.
Routing Rule Samples:
- Route request to the Awaiting Pre-Copyright Pipeline queue in the Borrowing Article Pre-Copyright pipeline if RequestType= Article.
- Route request to the Awaiting Request Pipeline queue in the Borrowing Loan pipeline if RequestType=Loan.